Université Paris Cité has chosen the ZOOM application for organising remote online meetings, distance learning, virtual classes and videoconferences, etc…
For more information:
Tutorials are available on Youtube
As of 8th July 2021, Zoom is available exclusively with your Université Paris Cité login details.
Connecting to Zoom
How to access Zoom
Link : https://u-paris.zoom.us/
Zoom is available to Université Paris Cité staff using their Université Paris Cité accounts.
Our students can now access this service, enbabling them to set up Zoom sessions using their Université Paris Cité account.
For any questions or problems contact: assistance.dsin@u-paris.fr
How can I logout of my Zoom account and login again with an Université Paris Cité account?
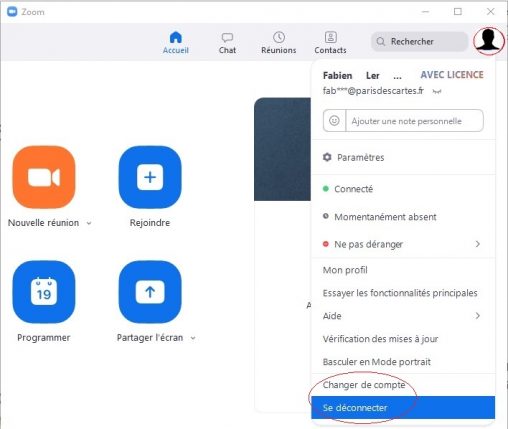
To sign out of your Zoom client, open your Zoom client
- Click on your profile
- In the drop-down menu, click on “Sign out”
- You can also choose “Switch account”
To sign in again:
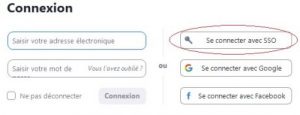
- Choose “Sign in with SSO”
- Domain name: u-paris
- Enter your University account.
What should I do if I have problems accessing Zoom (lost my login details, etc.)?
- If you have not activated your account, go to: Activating your Université Paris Cité account
- If you have forgotten your password, you can recover it by entering your backup personal email address: forgot your passcode
- If you do not know your recovery personal email address, contact: assistance.compte.dsin@u-paris.fr
Using Zoom
How can I install Zoom on my workstation?
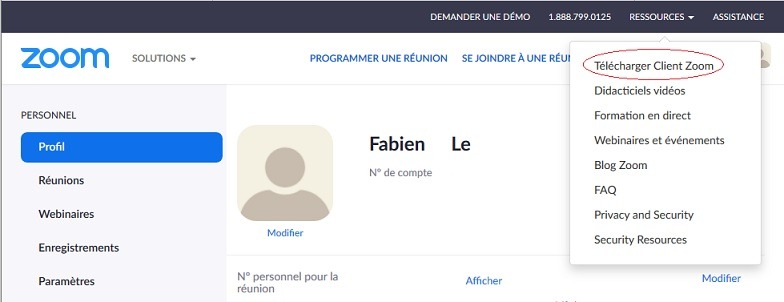
To download and install Zoom on your workstation:
- Go to: https://u-paris.zoom.us
- Click on the “Sign in” menu, which will take you to your account page
- In the top-right banner, click “Resources”, then “Download Zoom client”
Note: you do not need to be an administrator on your workstation to install this software.
When you first connect to Zoom, you have to install the “Start Zoom” application on your workstation. You can find it in your programmes:
![]() Start Zoom
Start Zoom
Open the application to connect or join a meeting
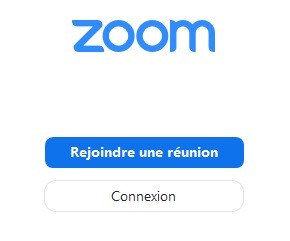
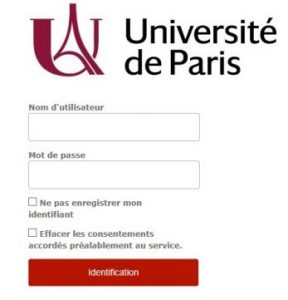
then log in with SSO
Indicate your domain: u-paris

Enter your Paris Descartes or Paris Diderot institution account
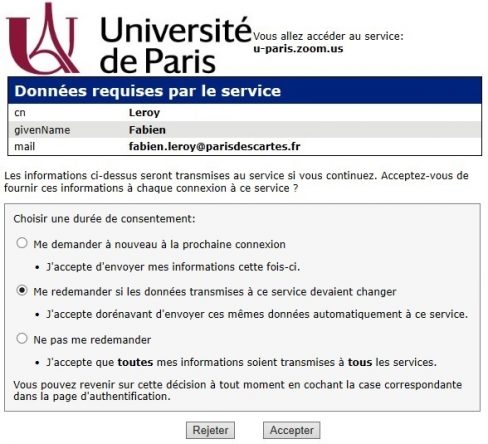
Validate your consent for your data:
Click on “Open link” to access the Zoom application:
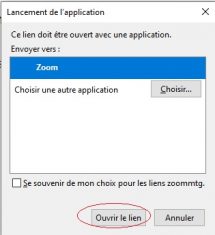
You are now on the Zoom application homepage:

You can:
- Create a meeting
- Join a meeting
- Schedule a meeting
- Share your screen
- Use the chat
- View your scheduled meetings
- View your contacts
How can I create a meeting with Zoom from my workstation?
In your programmes on your workstation, search for the app: Start Zoom
Click on it and sign in with the SSO (procedure presented above)
After signing in, you will access the app’s home page:
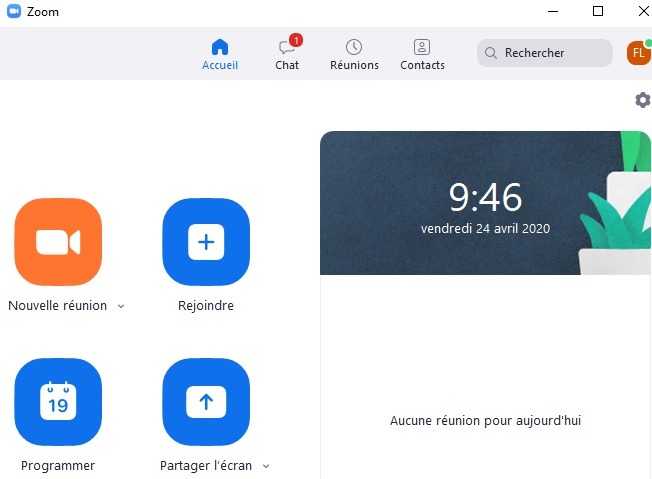
Click on “New meeting”
Your videoconferencing space will open automatically
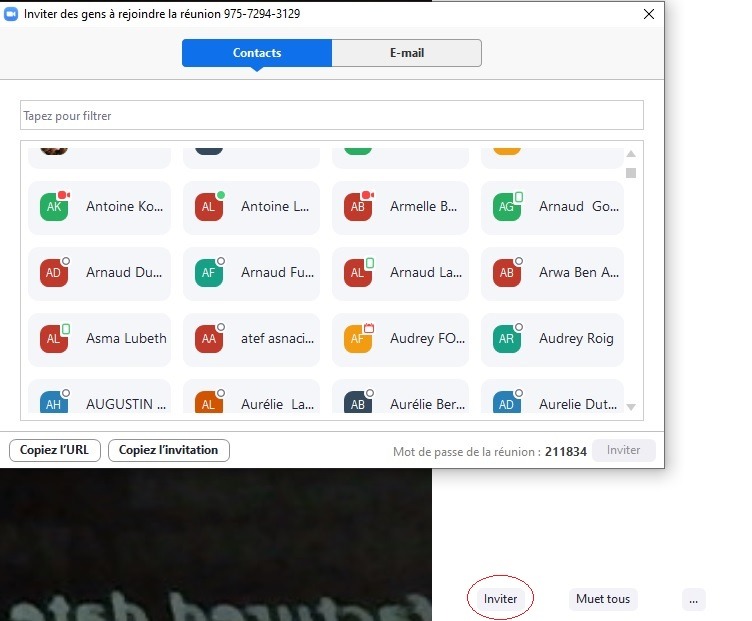
Click at the bottom of the screen on “Participants” to invite your participants

Select your invited participants from your “Contacts” or enter their “E-mail” address
How can I create a meeting with the online version of Zoom?
To create a meeting, you can:
- Create a meeting with an immediate invitation for your participants
- Schedule a meeting that will take place in a few days’ time (this meeting may be reocurring)
Create an immediate meeting:
- Head to: https://u-paris.zoom.us
- Click on the “CREATE” menu
- Sign in: How can you connect to Zoom online?
- Save the file and click on it to open the meeting
- Invite your participants by clicking on “Participants” in the menu at the bottom of your screen
- Choose your guests from your “Contacts” or enter their “Email”
- Click at the bottom of the screen on “Invite” to send an invitation to your participants.
Select your guests from your “Contacts” or enter their “E-mail” address
Click on “Invite” at the bottom of the screen to send an invitation to your colleagues.
How can I schedule a meeting with Zoom from my workstation?
Connect to the Zoom client version (Start Zoom):
On the home page, click on “Schedule”
A form will be displayed to schedule your meeting:
On this form, indicate:
- Your meeting’s date, time and duration
- Recurring meeting, check this box if this meeting will take place on a regular basis (same day, same time) – this will generate a single link for taking part in all of these videoconferences.
- Meeting ID, leave the default ID selected: “Generate automatically”. Avoid sharing your personal meeting ID with all your participants. This is your private meeting room.
- Passcode, leave this box checked by default to secure your meeting.
- Video, you can choose whether or not to start the video automatically for yourself and your participants when your meeting starts.
- Audio, you can choose the type of audio that will be automatically activated during your meeting. You can leave the default option selected.
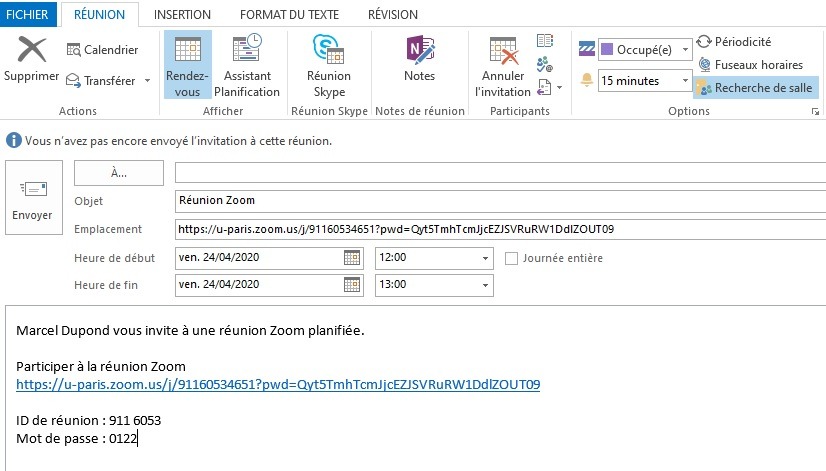
- Calendar, you can choose which calendar your invitation will be sent in:
- If you have the Outlook client installed on your workstation, you can choose this option. This will automatically create an invitation in your calendar and you can then simply add your participants’ email addresses in the To field in your calendar.
If you have another calendar, select this option. The invitation text will be displayed and you can copy it or choose your calendar:

Advanced options: you can activate its options depending on your requirements. If you have scheduled several consecutive meetings for instance, you can activate “Waiting room”, where your participants will be able to wait before you open the meeting. If you have a large number of participants, it may be wise to “mute participants on entry” when they join the meeting.
Click on “Save” to validate your scheduled meeting and generate your invitation.
How can I schedule a meeting with the online version of Zoom?
Go to: https://u-paris.zoom.us
Click on “Sign in” to access your account
At the top of the page, click on the menu “Schedule a meeting”
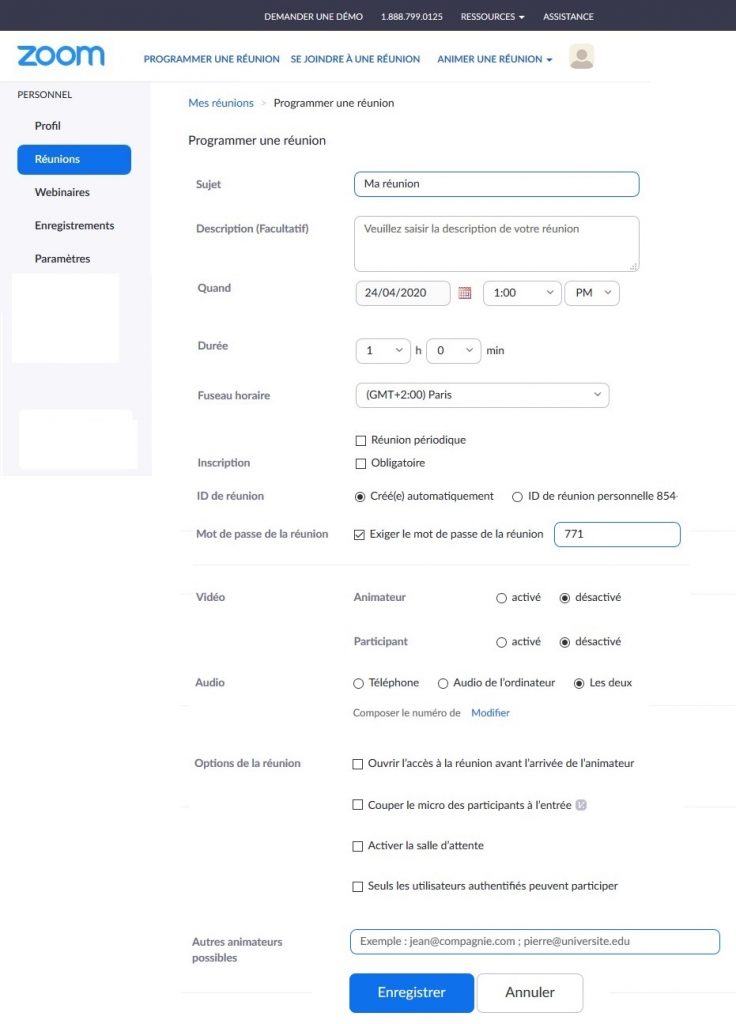
The following form will be displayed:
Complete the form to schedule your meeting, indicating:
- Subject: enter a title for your meeting and a Description if required (optional)
- Your meeting’s date, time and duration
- Recurring meeting, check this box if this meeting will take place on a regular basis (same day, same time) – this will generate a single link for taking part in all of these videoconferences.
- If registration is required (optional)
- Meeting ID, leave the default ID selected: Generate automatically. Avoid sharing your personal meeting ID with all your participants. This is your private meeting room.
- Passcode, leave this box checked by default to secure your meeting.
- Video, you can choose whether or not to start the video automatically for yourself and your participants when your meeting starts.
- Audio, you can choose the type of audio that will be automatically activated during your meeting. You can leave the default option selected.
- Advanced, you can activate its options depending on your requirements. If you have scheduled several consecutive meetings for instance, you can activate “Waiting room”, where your participants will be able to wait before you open the meeting. If you have a large number of participants, it may be wise to “mute participants on entry” when they join the meeting.
Click on “Save” to validate your scheduled meeting and generate your invitation.
The information to take part in your meeting will be displayed on the following screen:
You can then:
- View the settings that you have chosen
- Add this invitation to a calendar
- Copy the invitation
- Modify your meeting
- Start it now: “Start meeting”
- Delete the meeting
Tips
Managing participants’ microphones in Zoom
Managing the microphones of all your participants
You can limit the number of participants whose microphones are active during the session in several ways.
Click on “Participants” in the bottom toolbar.

In the window displayed on the right, under the list of participants, click on “Mute all” to disable all of the participants’ microphones.
To reactivate the participants’ microphones, click on “Unmute”.

Other options for managing participants’ microphones:
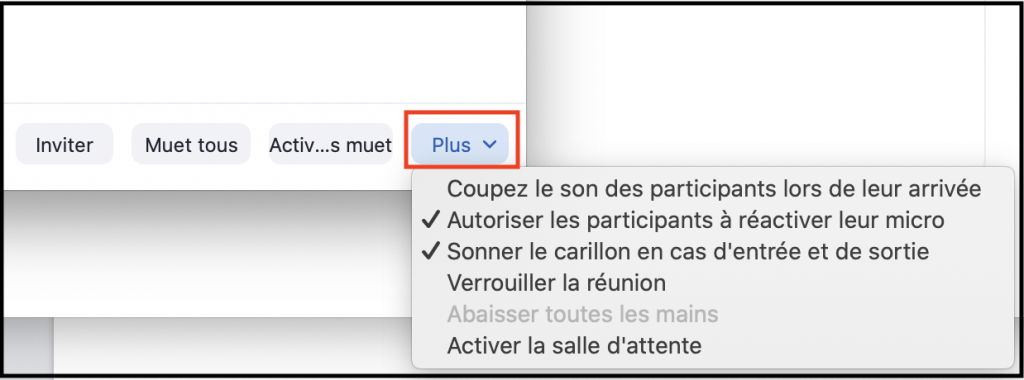
Click on “More” in the bottom right corner below your list of participants
In the dropdown menu displayed:
- On PC, click on “Mute participants upon entry”
- On Mac, click on “Mute participants upon entry”
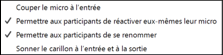
If necessary, you can prevent students from unmuting their microphones:
- On PC, deselect the option “Allow participants to unmute themselves”
- On Mac, deselect the option “Allow participants to unmute themselves”
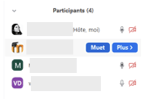
Managing a specific participant’s microphone:
In the list, next to each participant’s name, you can also mute and unmute each microphone individually.
- To mute a microphone, move your mouse over a participant’s name and click on “Mute”
- To unmute, move your mouse over a participant’s name and click on “Unmute”
Using the chat in Zoom
The chat enables you to send text messages to students in your virtual class. You can send a private message to an individual user or you can send a message to a whole group.
Starting a chat
Click on the “Chat” button in the toolbar at the bottom of your Zoom window:

Your chat window will open on the right:
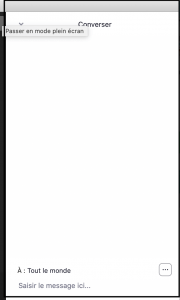
Type a message in the chat box. By default, you will send a message to the whole group.
To contact a particular student, click on the dropdown menu to select the student that you want to send a message to.
Individual private messages are shown in red in your chat.
If your chat is closed, but a student sends a message, the chat will flash orange in the toolbar to indicate that a new message has been sent.
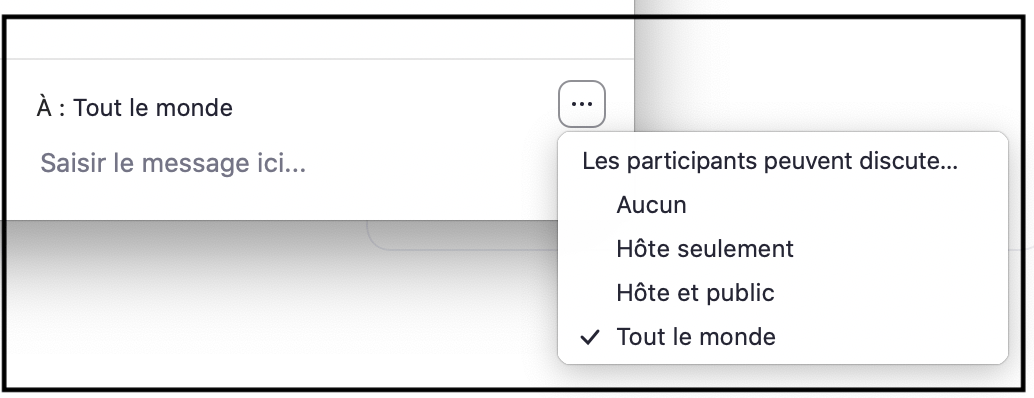
Configuring your chat settings for all participants
As a teacher, you can choose who students can chat with or deactivate the chat completely.
To manage the chat conditions, click on the “More” (…) button at the bottom right of the chat window, and select the option that you need:
How can I display audio numbers in my Zoom invitation?
When you connect to Zoom: connect to Zoom :
- Go to your profile and click on the “Settings” menu
- Then, at the top of the page, you have three other menus: Meeting / Recording / Phone
- Click on “Phone”
- Select “Show international numbers link on the invitation email”
- At the bottom of the page, you will see: “Global dial-in countries/regions” Select: France
Schedule a meeting:
In the form to schedule a meeting, you have an “Audio” menu; check that the “Both” option is selected (phone and computer audio).
The audio numbers will now be displayed in your Zoom invitation.
Activating your Université Paris Cité account
Your Université Paris Cité account will enable you to access services such as Moodle, student email, Mon Dossier Web, ECandidat, etc.
Technical support
Read the online documentation
Are you still having problems despite the tutorials? Contact: assistance.dsin@u-paris.fr
Read more

Call for applications: SMARTS-UP Graduate Schools incoming mobility scholarships for master’s students
The SMARTS-UP Graduate Schools programme at Université Paris Cité aims to promote the internationalisation of Master's programmes and facilitate the admission of top international students, creating a pool of excellence for the recruitment of future PhD candidates....
[SMARTS-UP Graduate Schools call for applications] Outgoing mobility scholarships for master’s students
The SMARTS-UP Graduate Schools programme at Université Paris Cité aims to promote the internationalisation of Master's programmes and facilitate the integration of top students into international organisations, creating a pool of excellence for the recruitment of...

Circle U. Model United Nations
From the 10th to the 14th of December 2024, the Circle U. European university alliance invites you to slip into the shoes of a diplomat by taking part in the Circle U. Model United Nations organised in Brussels. This year, the debates will focus on the theme of...

Student and Campus Life Contribution (CVEC), Necessary for Enrollment
In accordance with the law on student orientation and success, implemented on 8 March 2018, students admitted to a French institution of higher education are subject to a fee known as the CVEC. The fee must be remitted to the CROUS before enrolling. Here is...